Reviving History: The Art of Fermentation with My 1820 Sourdough Starter
In the world of bread baking, there’s something truly magical about working with a sourdough starter that has been passed down through generations. My own sourdough starter, which dates back to 1820, carries with it a rich history and a unique flavor profile that modern starters simply can’t replicate. In this post, I’ll share the fascinating journey of my ancient starter and the art of bread fermentation that brings it to life.
A Starter with a Legacy
The story of my sourdough starter begins in the early 19th century, in a small village where my ancestors first cultivated it. Over the years, it has been meticulously cared for, with each generation passing down not just the starter itself, but the knowledge and traditions associated with it. This starter is a living link to the past, a testament to the enduring power of natural fermentation.
The Science of Fermentation
Fermentation is a natural process that transforms flour and water into a bubbling, living culture full of wild yeast and lactic acid bacteria. These microorganisms are the heart of sourdough, responsible for the distinctive tangy flavor and airy texture of the bread.
When I feed my 1820 starter, I combine equal parts of flour and water, creating the perfect environment for the wild yeast and bacteria to thrive. As they consume the sugars in the flour, they produce carbon dioxide gas, which causes the dough to rise, and organic acids, which give the bread its characteristic sour taste.
The Daily Ritual
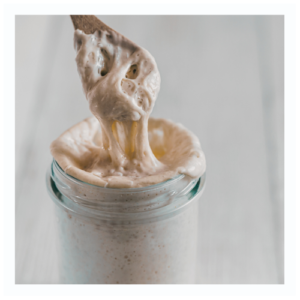
Maintaining a sourdough starter, especially one with such a storied past, requires dedication and a bit of daily ritual. Each day, I discard a portion of the starter and replenish it with fresh flour and water. This keeps the microbial community healthy and active. Watching the starter come to life, bubbling and doubling in size, is a rewarding experience that connects me to bakers from centuries past.
The Joy of Tradition
Baking with my 1820 sourdough starter is more than just making bread; it’s about preserving a piece of history and continuing a family tradition. Each loaf is a tribute to the bakers who came before me and a testament to the timeless art of fermentation. If you ever have the chance to work with an heirloom starter, I highly recommend it. The flavors, the history, and the connection to the past make every bite truly special.
Baking with an 1820 Starter
Baking with a sourdough starter that’s nearly 200 years old adds a special dimension to the process. The flavors it imparts to the bread are complex, with subtle notes that reflect its long history. Here’s a simple recipe to try if you’re curious about baking with a sourdough starter.
Simple Sourdough Bread Recipe
Equipment
- 1 Pullivuyt Dutch Oven
Ingredients
- 1 cup Active sourdough starter
- 1½ cups Water
- 4 cups Bread Flour
- 2 tsp Salt
Instructions
- Mix: In a large bowl, combine the sourdough starter and water, stirring until the starter is dissolved. Add the flour and salt, mixing until a shaggy dough forms.
- Rest: Cover the bowl with a damp towel and let the dough rest for 30 minutes.
- Knead: After resting, knead the dough for about 10 minutes until it becomes smooth and elastic. Place the dough back in the bowl, cover, and let it rise at room temperature for 4-6 hours, or until it has doubled in size.
- Shape: Turn the dough out onto a lightly floured surface and shape it into a round loaf. Place it in a proofing basket or a bowl lined with a floured towel. Cover and let it rise for another 2-4 hours.
- Preheat: Preheat your oven to 450°F (230°C) with a Dutch oven inside.
- Bake: Carefully transfer the risen dough into the hot Dutch oven. Score the top of the dough with a sharp knife, cover, and bake for 20 minutes. Remove the lid and bake for an additional 20-25 minutes, or until the bread is golden brown and sounds hollow when tapped.
- Cool: Let the bread cool on a wire rack before slicing.